Disney Candied Apples: Evil Queen’s Poison Apple

It’s that spooktacular time of year when the pumpkins are ready for carving, the sugar is boiling, the cinnamon is wafting, and the apples are perfectly ripe. Halloween is one of our favorite holidays and we love the delicious treats this season brings – starting with these Disney inspired candied apples. These sweet treats are fun for the whole family to make and have a delicious reward when you are done. So pick your poison and start with the Evil Queen’s Poisonous Apple.
For these apples, we chose sweet and crisp varieties such as Honeycrisp, Pink Ladies, Gala, SweeTango, Jazz, Lady Alice, or whatever local apples you may have in season that will pair nicely with the vanilla flavors in the candy melts. We are using Honeycrisp apples.

We start this recipe the way we do all of our recipes by first gathering all our ingredients and equipment. You will need:
- Red Wilton Candy Melts or Make’n Mold Candy Wafer
- Vibrant Green Wilton Candy Melts or Make’n Mold Candy Wafer
- Large apples
- Candy sticks
- Piping bags (or parchment paper)
- Wilson Candy Melts Pot or Glass bowls for microwave or Double Boiler
- Printout Pattern (provided below)
The first step is to prep the apples. Push the candy stick into the core from the top down. If it is too tough we suggest making a hole with a chopstick, skewer, or something similar.
Next, prepare to melt the Red Wilton Candy Melts. For small batches and working with children, we suggest using the Wilton Candy Melts Pot. It provides even low heat and the outside is not hot to the touch. Follow the manufacturer’s safety guidelines.


For larger batches and a pouring consistency, we suggest the microwave and/or double boiler. We suggest 10-15 seconds in the microwave and finish off on the double boiler till you get the consistency you want. Stir continuously to smooth and prevent burning
You can scoop and pour the mixture over the apple, allowing the candy coating to drip down with an even coating. If need be, use a silicon or icing spatula to spread an even coating and fill in thin spots. Rest the coated apple on parchment to allow the candy melt coating to cool and harden.


Once the red candy melt coating has hardened melt a smaller quantity of the vibrant green Wilton candy melt using any of the methods previously mentioned. Pour the melted candy coating into a piping bag.
Note: Wilton disposable piping bags are microwavable. Candy melts can be placed directly inside the disposable piping bag. Microwave 10-15 seconds at a time, massaging the bag between heating. This technique also works when using the piping bag over a period of time in which the contents may harden.


Cut the smallest tip possible on your piping bag. Test the size first before cutting a larger opening. We also suggest practicing the face on a piece of parchment before application to the candied apple.
We have supplied our own printable template for you. Place template under a piece of parchment and use your piping bag to trace.
When you are ready we suggest starting with the eyes first then add the upside down heart for the nose. Next, draw the drip outline around the perimeter of the whole apple. Pay close attention to the ‘teeth‘ area right under the nose to give the skull illusion. Let harden.

Reheat the piping bag, following previous instructions. Take care coloring in the area around the nose, eyes, and ‘mouth‘. When filled in, cut the tip of the piping bag larger and color in the remainder of the apple. The hardened outline acts like a barrier that prevents the green from dripping.

Allow the green candy melt piping to harden before handling the apple.
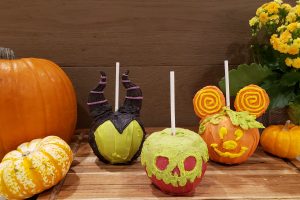
Once solidified, the apple is ready to display proudly as a lovely addition to your Disney Halloween decor or table. And when you are done showcasing your creation don’t forget to enjoy your tasty treat – but don’t wait too long to take that bite of the Evil Queen’s most precious apple.

This recipe is like a fun craft where it can be finished over the course of a couple of days. The main trick is to get a base layer on the apple after puncturing it with the candy stick. This will seal the apple and prevent it from exposure (refrigerate in warm and humid climates). With the base coat on, add the finishing touches at your leisure. Eat within a week.
To speed up the setting of the Candy Melt coating place in the refrigerator for a few minutes.
Candy Melts may be reheated multiple times and reused after this project as long as they are stored in a cool dry place.
All Candy Melts flavors and colors are considered Gluten Free. Check individual packaging for processing on equipment for those with Celiac and gluten allergy.
For manufacture’s demonstration of melting techniques. Check it out.
Disney Candied Apples: Evil Queen Poison Apple
Equipment
Ingredients
- 1 bag Red Wilton Candy Melts
- 1 bag Vibrant Green Wilton Candy Melts
- 1-3 Large apples
Instructions
- The first step is to prep the apples. Push the candy stick into the core from the top down. If it is too tough we suggest making a hole with a chopstick, skewer, or something similar.
- Next, prepare to melt the Red Wilton Candy Melts. For small batches and working with children, we suggest using the Wilton Candy Melts Pot. It provides even low heat and the outside is not hot to the touch. Follow the manufacturer's safety guidelines.
- For larger batches and a pouring consistency, we suggest the microwave and/or double boiler. We suggest 10-15 seconds in the microwave and finish off on the double boiler till you get the consistency you want. Stir continuously to smooth and prevent burning
- You can scoop and pour the mixture over the apple, allowing the candy coating to drip down with an even coating. If need be, use a silicone or icing spatula to spread an even coating and fill in thin spots. Rest the coated apple on parchment to allow the candy melt coating to cool and harden.
- Melt a smaller quantity of the Vibrant Green Wilton Candy Melts using any of the methods previously mentioned. Pour the melted candy coating into a piping bag.
- Note: Wilton disposable piping bags are microwavable. Candy melts can be placed directly inside the disposable piping bag. Microwave 10-15 seconds at a time, massaging the bag between heating. This technique also works when using the piping bag over a period of time in which the contents may harden.
- Cut the smallest tip possible on your piping bag. Test the size first before cutting a larger opening. We also suggest practicing the face on a piece of parchment before application to the candied apple.
- Place the provided template under a piece of parchment and use your piping bag to trace.
- When you are ready to decorate your apple, we suggest starting with the eyes first then add the upside-down heart for the nose. Next, draw the drip outline around the perimeter of the whole apple. Pay close attention to the 'teeth' area right under the nose to give the skull illusion. Let harden.
- Reheat the piping bag, following previous instructions. Take care coloring in the area around the nose, eyes, and 'mouth'. When filled in, cut the tip of the piping bag larger and color in the remainder of the apple. The hardened outline acts like a barrier that prevents the green from dripping.
- Allow the green candy melt piping to harden before handling the apple.
- Once solidified, the apple is ready to display proudly as a lovely addition to your Disney Halloween decor or table. And when you are done showcasing your creation don't forget to enjoy your tasty treat - but don't wait too long to take that bite of the Evil Queen's most special apple.
Notes

0 Comments